16 Crafts for Adults with Intellectual and Developmental Disabilities

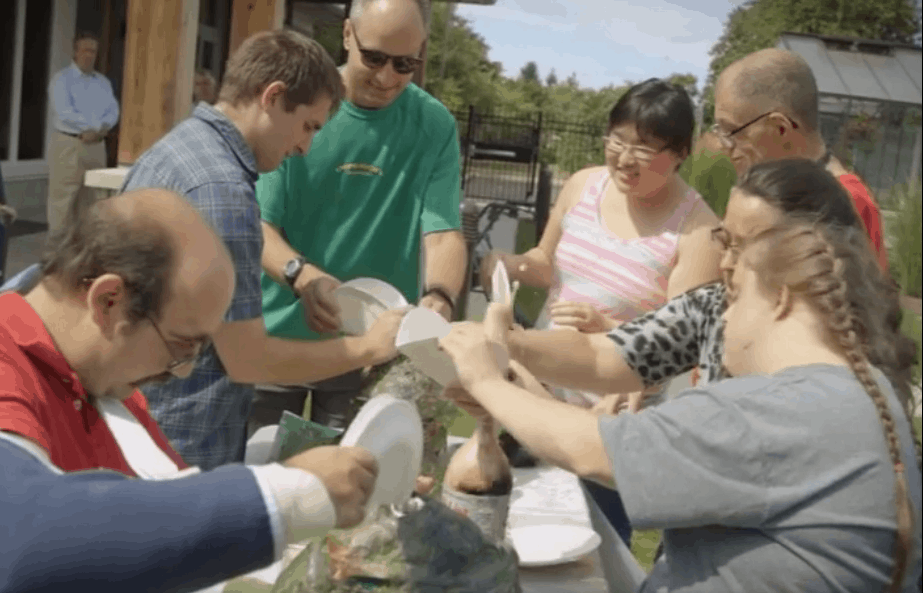
Individuality and a sense of community are both key in life. This is very important to us here at Stephen's Place, and we try to support our residents, with intellectual and developmental disabilities, by providing arts, crafts, and a wide range of other activities. Some of our craft programs include jewelry making, group poster coloring, paper mache, pinecone bird feeder making, and awesome DIY crafts. Here are our favorite 16 crafts for adults with developmental disabilities:
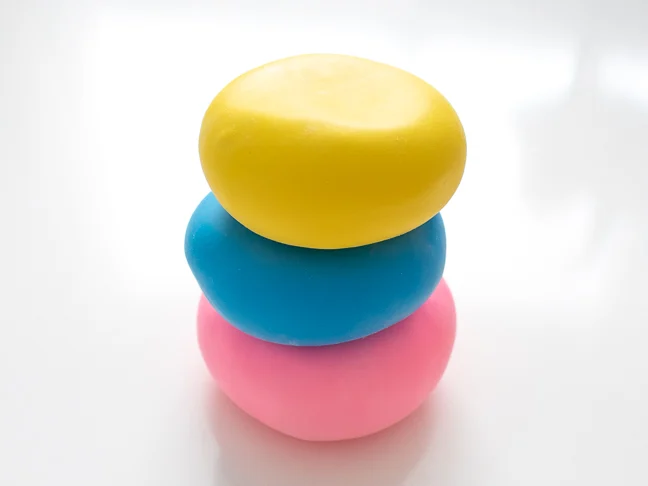
DIY Stress Ball
Stress balls stimulate tactile sensation which, in turn, can help relieve stress. This can be immensely beneficial for adults with intellectual and developmental disabilities who suffer from high anxiety. Having a stress ball helps to improve dexterity and strengthen hand and forearm muscles. It can also be used to help people feel a greater sense of calm for everyone.
You will need:
1 cup of cornstarch
Funnel
Permanent marker (optional: for drawing designs)
Scissors
Instructions:
Partially inflate the balloon until it is about 5 inches round. Do not tie it. Instead, use your finger to pinch it to prevent the escape of air.
Fix the funnel to the mouth of the balloon and fill it with cornstarch powder.
Slowly release your pinched finger to allow the cornstarch to drip into the balloon.
After filling the balloon, squeeze out excess air to ensure your stress ball only contains cornstarch.
Tie the balloon and cut off the mouth with the scissors.
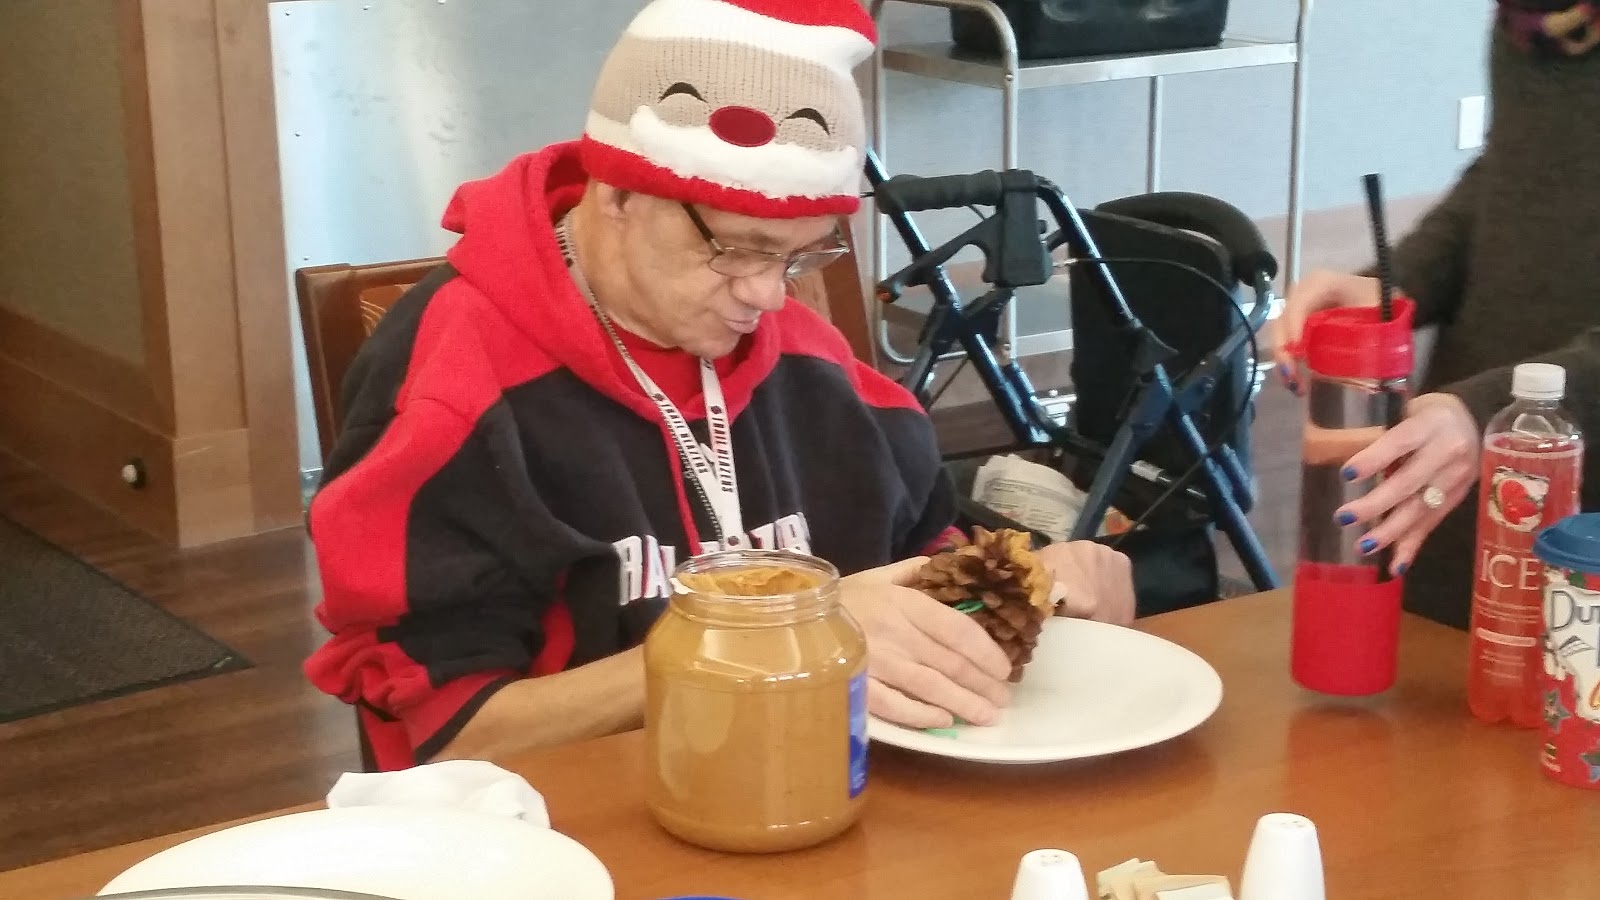
Pinecone Bird Feeders
Making bird feeders is a bit of twofer–you’ve got the activity itself and then the fun of watching and identifying wild birds as they check out your pinecone feeder.
To make a pinecone bird feeder, you will need:
Peanut butter
Birdseed
Shallow container, tray or baking dish
Butter knife or spatula
A piece of string or ribbon
Instructions
Empty some bird seed into your shallow container
Cover your pinecone in peanut butter, making sure to smoosh it into the crevices in between the pine needles
Roll the peanut-butter-laden pinecone in the seeds to give it a good coat
Tie string or ribbon to the top of the pinecone and form a loop to hang your feeder up outside.
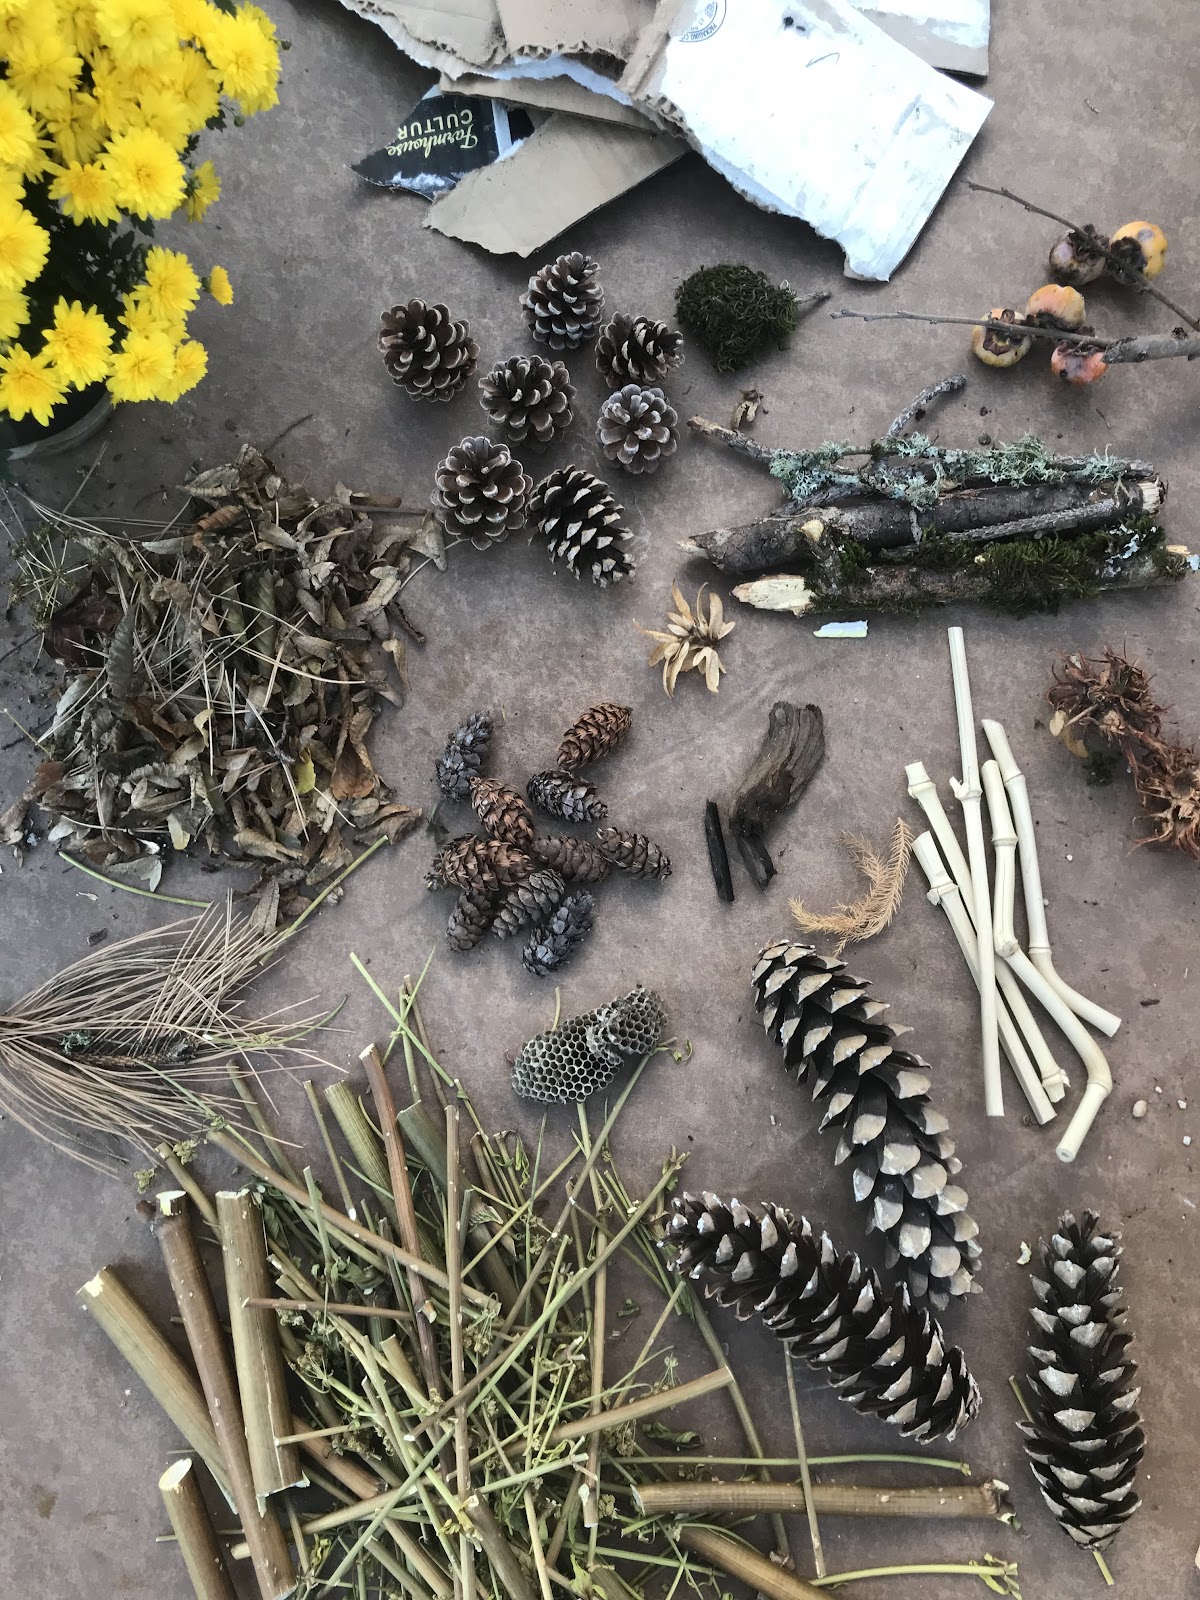
Bug Hotel
Bugs are necessary for healthy gardens and gardens are great places to learn in and from. In scientific studies, gardening has been shown to reduce stress, alleviate depression, have a calming effect, and stimulate the senses.
Bug hotels give your bugs a place to hang out during the summer months and hibernate in the winter months. If you build it, they will come! Solitary bees (whom, despite their name, fly around in small swarms) like to use hollow stems for the winter. They’ll pack a few members of their group into each hollow stem, and close it up with a little mud to create the perfect place to sleep. Ladybugs enjoy nesting in between dry twigs. Other bugs have a variety of preferences, so you need a variety of different materials.
You will need:
Bamboo stems (cut to the depth of your box), twigs, sunflower heads (optional), lichen, pinecones, wood shavings, and leaves to attract a variety of bugs
A large wooden box or crate, you can find these at craft stores
A drill
Garden twine
Instructions
Before you get started on the decor for your bug hotel, drill two holes in one of the shorter sides of your box. The holes can be right next to each other, but will work better if they are at least 5” apart. They’ll need to be aligned to the center of the side of the box, in order to be able to hang your bug hotel and balance it evenly.
Take 16” of twine and thread it through one of the holes. Tie a knot in the twine in the inside of the box, do the same for the other end of your twine using the second hole.
Pull on the string to make sure that it’s secure and will be able to hang your bug hotel. If you feel like the knots won’t hold, reinforce each of them by adding another knot around the original knots.
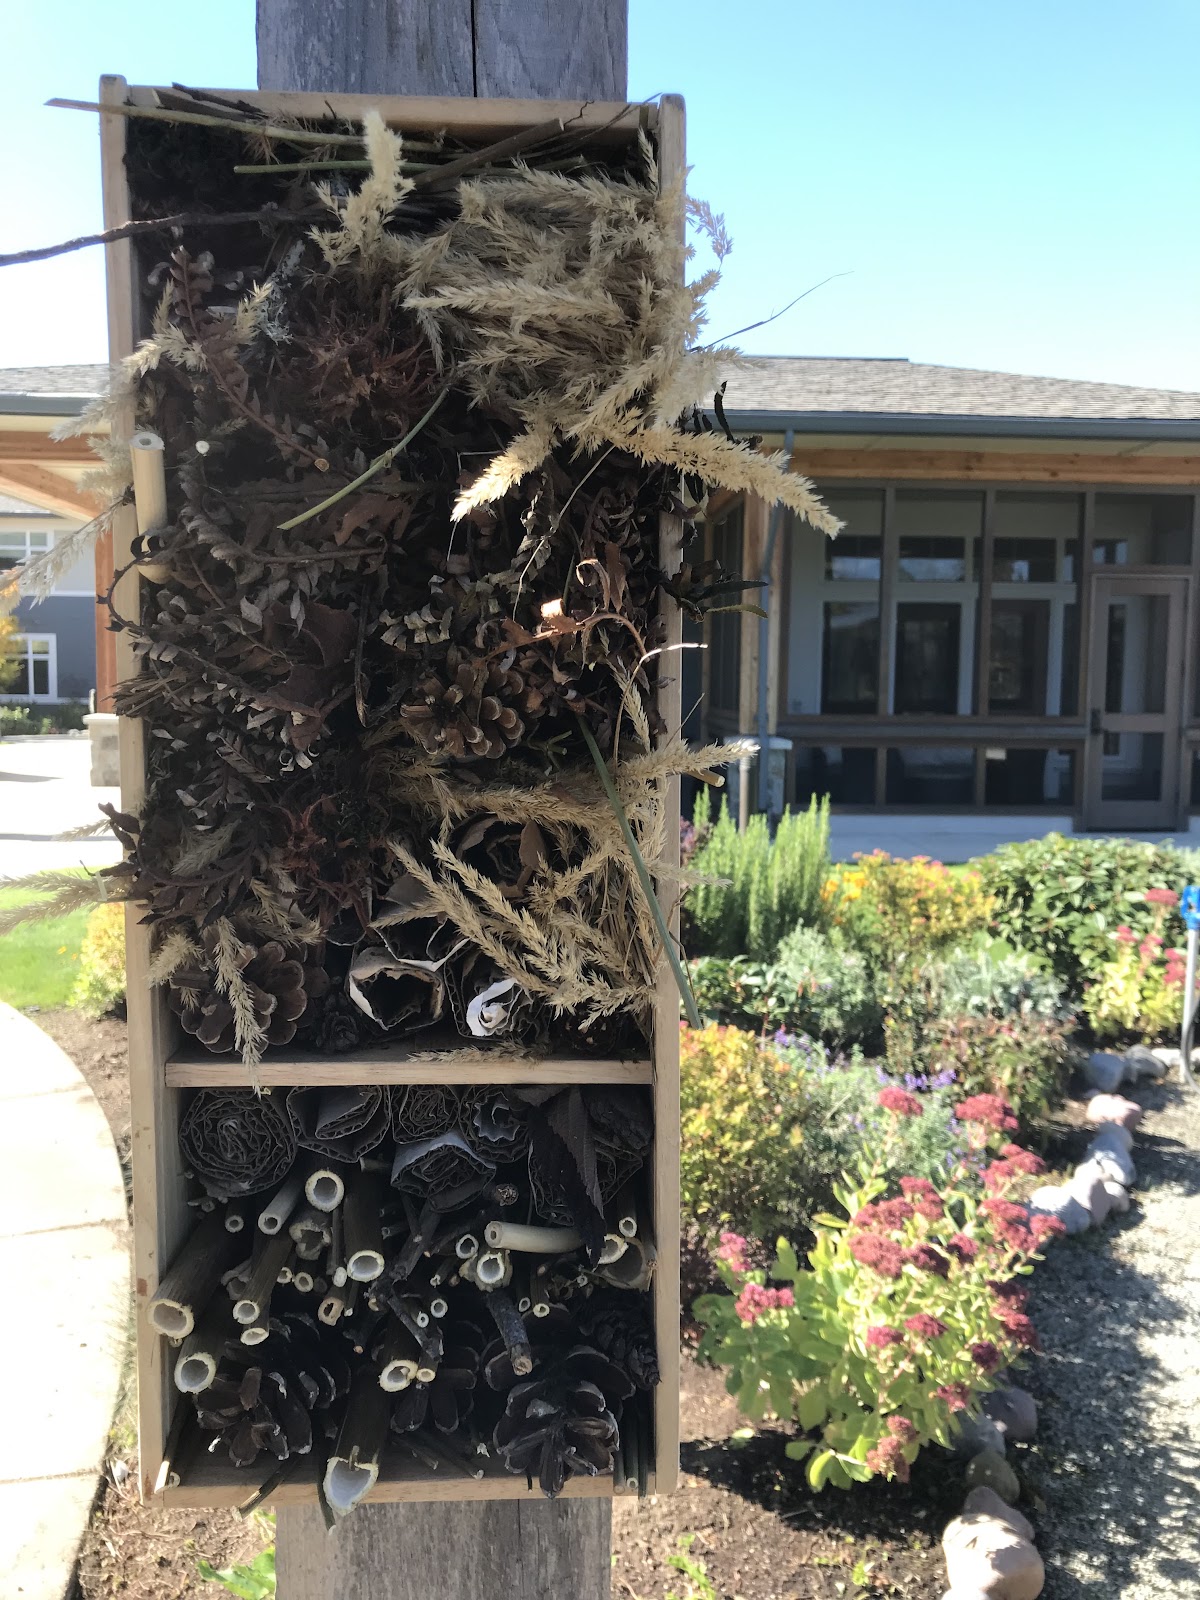
Once your structure is ready, you can start adding your materials.
Start at one end by laying the cut bamboo stems down so that the holes are facing outwards. Fill a third of the box in this way.
Next, lay a 2-inch-wide pile of twigs across the box and kind of jam them in to make sure that they stay in place.
Next, pack the rest of the materials into the remaining space in the box. Keep all of the similar materials together (i.e. keep the pinecones with the pinecones)
When packing the materials in, make sure that they’re tight enough to stay in but not too tight that the bugs can’t get in!
Hang your bug hotel in your garden and watch as they start to check-in!
Source: https://www.makeandtakes.com/diy-paper-spinner
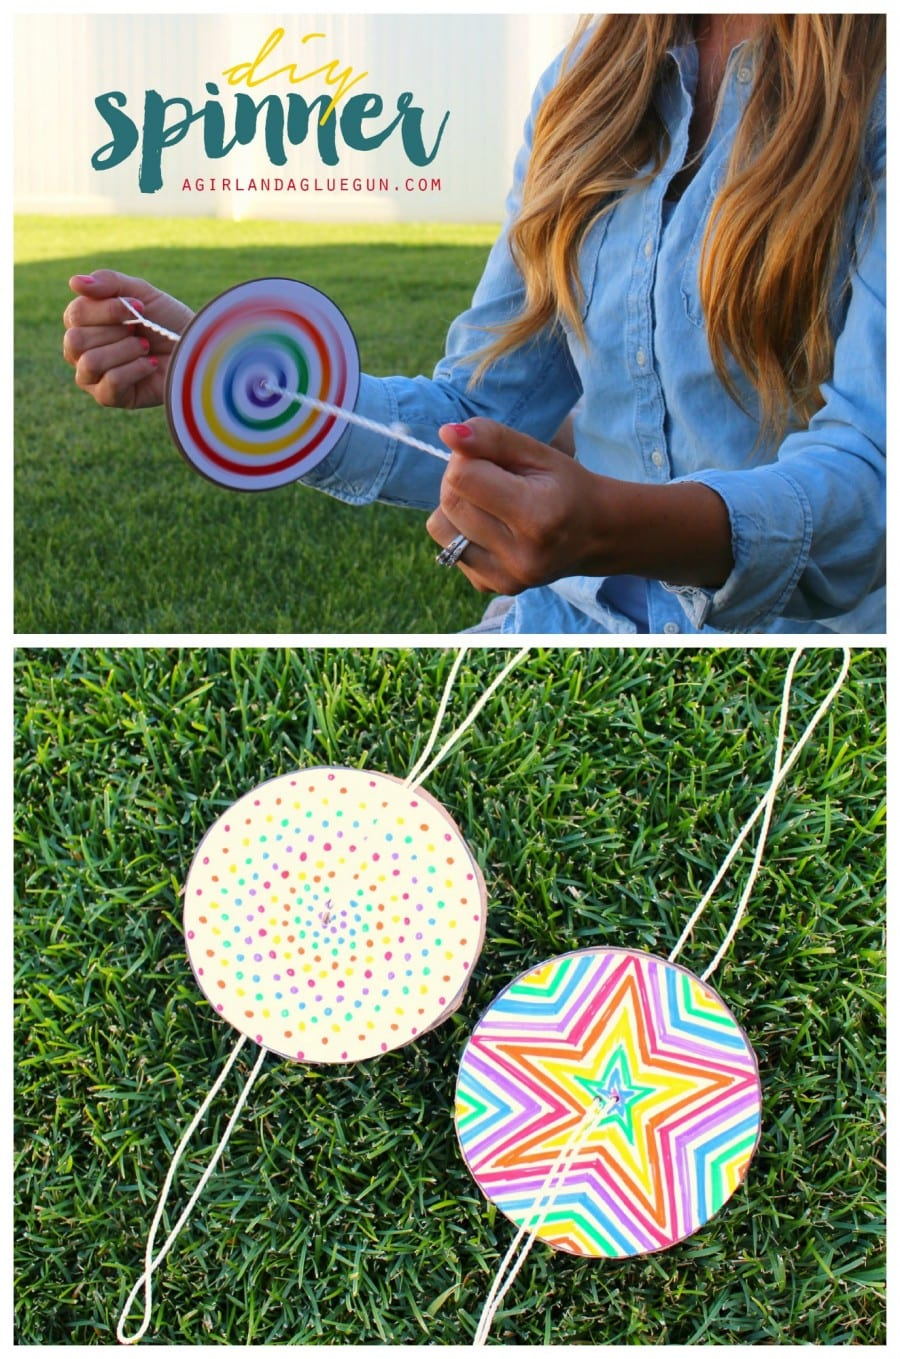
Paper Spinner
You will need:
A circular item to use as a template (4”-5” in diameter)
Rigid cardboard
Scissors
Paper
String
Felt pens
Glue
Instructions
Use the circular template to draw 2 circles on the paper and 1 on the cardboard
Decorate the paper circles with patterns like spirals or stripes (patterns tend to look more awesome than stand-alone pics when spun)
Cut out the paper and cardboard circles
Stick the paper designs onto each side of the cardboard circle
Make 2 small holes in the centre of the spinner and thread the string through
Tie the loose ends of the string together to keep the circles on the string
To use your spinner, hold the loops on either side, moving your hands in a circular motion, pulling and relaxing the string.
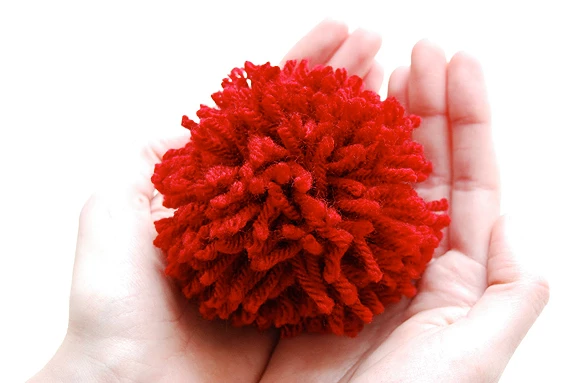
Pompoms
You will need:
Yarn
Cardboard
Scissors
A circular template (like a large glass or plastic cup)
Instructions
Draw 2 circles with the template on the card
Cut the circles out
Draw another small circle in the middle of each larger circle and cut these out as well
Cut a length of yarn (long enough to trace the circles and leaving extra to tie)
Slide the length of yarn in between the circles so that it can be sandwiched between the two circles and later used to secure the bits of yarn that will become your pom pom
Place the two cards together with the length of yarn running parallel to the edges
Pass the yarn through the centre and around the sides of the circle continuously, until the whole of the card is covered
Take the scissors and cut the yarn around the outer edge between the 2 circles, making sure not to disturb it too much
Using the length of yarn that is sandwiched between the circles, tie a tight double knot between the circles. This will secure all of your yarn together
Remove the cardboard and fluff out your pompom
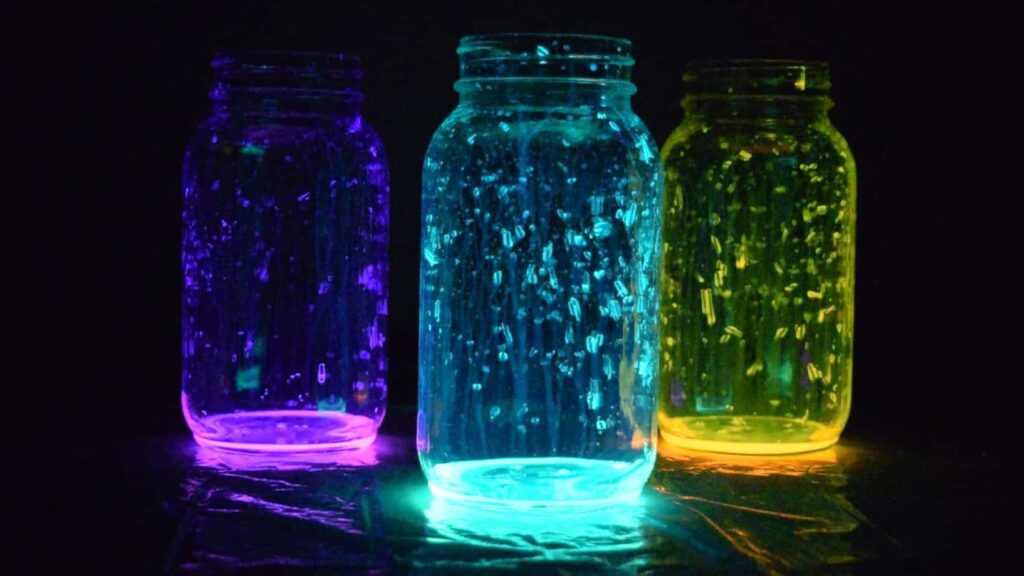
Fairy Glow Jars
Using the humble Mason jar with some glow in the dark nail polish and pixie dust, you can make a room look pretty magical.
To make fairy glow jars, you’ll need:
1 mason jar
Glow in the dark paint
Paintbrushes
Paper to use as an easel
Elmer’s glue
A little bit of pixie dust (glitter)
Instructions:
1. Pour some of the glow in the dark paint out on the paper so you can easily mix it when you go to paint your jar.
2. Open up your jar and dip a paintbrush into the paint. Starting at the bottom of the jar, dab little specks of paint all over the inside of the jar. It’s important to cover the bottom of the jar first so you don’t smudge the sides when you get there.
3. After you’ve covered the entire inside of the jar in specks of glow in the dark paint, leave it to dry. When it’s all set, leave it out in the sun for about a half hour so it can charge up the glow!
4. While the jars are charging in the sun, you can take the top of the lid and cover it in a thin layer of Elmer’s glue. Sprinkle pixie dust all over it, making sure it’s covered in an even layer. When that dries, tap off the excess.
5. Put the lid back on the jar and watch it sparkle! For extra magic, hang them up in your room so you can have your own DIY nightlights!
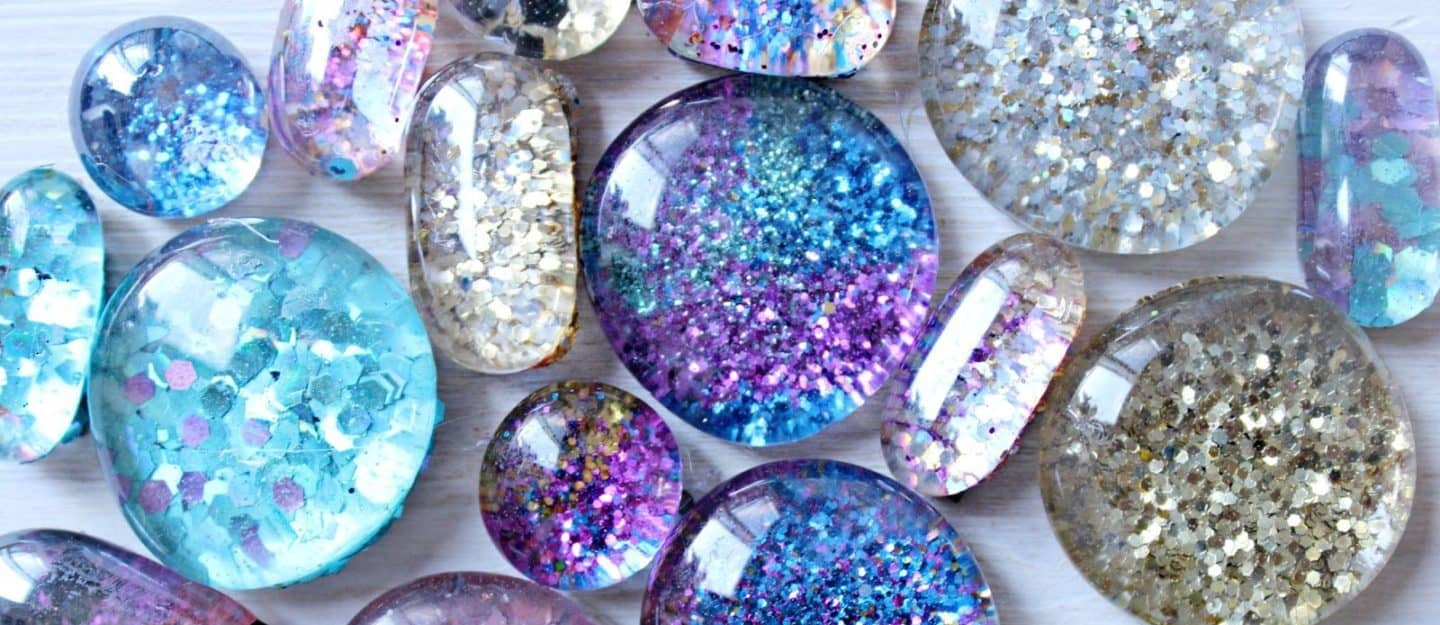
Glitter Magnets
Sometimes, just sometimes, our residents like to add flair to their fridges and these easy to make magnets are perfect for that. With rounded glass gems, glitter, and some ever-useful Modge Podge, glitter magnets are an easy way to give any fridge a touch of individualized style.
You’ll need:
Magnets
Hot glue and hot glue gun
Mod Podge
Paint brushes
Glass gems
Glitter
Paper plates
Disposable tablecloth or paper
Instructions
Make sure you spread a disposable tablecloth or paper down to counteract the glitter fallout. Pour out some of the Mod Podge onto a paper plate
Pour out some of the Mod Podge onto a paper plate.
Dip the flat side of the gems into the glue.
Sprinkle glitter onto the sticky side of the gems. Once your gems have a satisfactory amount of sparkle, let them dry for 2 hours.
Once the gems are dry, tap them against the clothed table. Take your paint brush and spread a thin layer of Mod Podge over the gem to seal in the glitter. Let that dry for 2 hours again.
Check to make sure no glitter comes off your gems. If there’s a ton of excess, repeat step 5 until the glitter is completely sealed in.
With the flat side facing up, start gluing the magnets onto the backs of the gems using a hot glue gun.
Once the hot glue has completed its task, stick those beautiful gems up on your fridge.

Bubble Wrap Stomp Paintings
You know that wonderful feeling of satisfaction you get from popping bubble wrap? What if we told you that this activity is a step up? In this new universe, you get to pop as much bubble wrap as you want and make an awesome piece of art at the same time.
Here’s what you’ll need to make a stomp painting:
Bubble wrap
1 large roll of paper (the largest you can find)
Paint, washable preferred
Tablecloth or plastic to cover surfaces
Painter’s apron or clothes you don’t mind getting paint on
Scotch tape
Instructions
Prepare the room for a mess! Cover anything you don’t want to get dirty with plastic or a tablecloth you don’t care about. Lay out the large paper on the ground so it’s ready for stomping. Make sure you’re wearing a painter’s apron or clothes that have seen better days.
Wrap bubble wrap around your feet or hands, securing with a little bit of tape
If you have various sizes of bubble wrap, you’ll get some interesting patterns on your painting
Dip your bubble-wrapped hands/feet in the paint.
Stomp!
Diet Coke and Mentos Rockets
Come on… You know we’ve tried it at least once. This activity literally is a blast, and we've had many fun summer's day enjoying this scientific experiment.
You will need:
1 liter of (warm, not cold) Diet Coca Cola
1 package of mint Mentos
Masking tape
Scissors
Instructions
Start by letting your soda come to room temperature. Why diet cola instead of regular? Because diet has more carbonation so it’s way more exciting than regular.
Once you have all your supplies gathered, begin by cutting 2 strips of masking tape, each about 4 inches long.
Line up about 4 or 5 Mentos on one strip of masking tape like a stack of coins, making sure you leave some space on either side of the Mentos line. Then place the other strip along the top.
Cut another strip of masking tape 3 inches long and roll it around your fingertip, sticky side out. Place it on top of the Mentos line to complete your Mentos cartridge
Fasten the Mentos cartridge to the bottom of the soda bottle cap
Wrap any loose tape ends around the bottom of the Mentos cartridge
Carefully load the Mentos cartridge into the soda bottle, but don’t screw the cap on too tightly
If the Mentos look like they might touch the soda, you can take out a few Mentos before you proceed
Once the cap is on securely, shake the bottle. The rocket is now ready for lift off
There are several different ways to launch the Mentos Rocket, we decided to let the magic happen by placing the bottle on a foldout table.
Seashell Sensory Bottles
Using liquid hand soap, food coloring and of course seashells, these Sensory Calm Down Jars are one of the most perfect things to ever walk the face of this earth–or swim the deepest blue seas. Seashell Sensory Bottles look and act a lot like magic in situations where calm is needed quickly. Here’s how to make your own:
You will need:
1 cylinder-shaped bottle, preferable a Voss Water Bottle
Blue liquid watercolor paint or food coloring
Liquid hand soap
Goo Gone
Super glue
Water
Seashells! (If you can’t get real ones, Michael’s and other craft stores usually carry look-a-likes that would work just fine)
Instructions
Set your seashells in a bowl of warm soapy water. Let them sit while you take care of the next steps
Use the Goo Gone to get rid of any stickers on your cylinder-shaped bottle.
Place your clean seashells into the cylinder bottle, along with half a cup of water
Put a few drops of food coloring or watercolor paint into the water
Fill the bottle the rest of the way with liquid hand soap, place the lid on and (gently) shake it up!
Allow the mixture to settle and you have your finished Calm Down Jar
Tip – if you want the shells to move faster, add more water to the mixture. If you want the shells to move slower, add more soap. Once you’ve found your perfect balance, we recommend gluing the lid on so there’s much less chance of it flying off and spilling everywhere. Enjoy the serenity of your new creation!
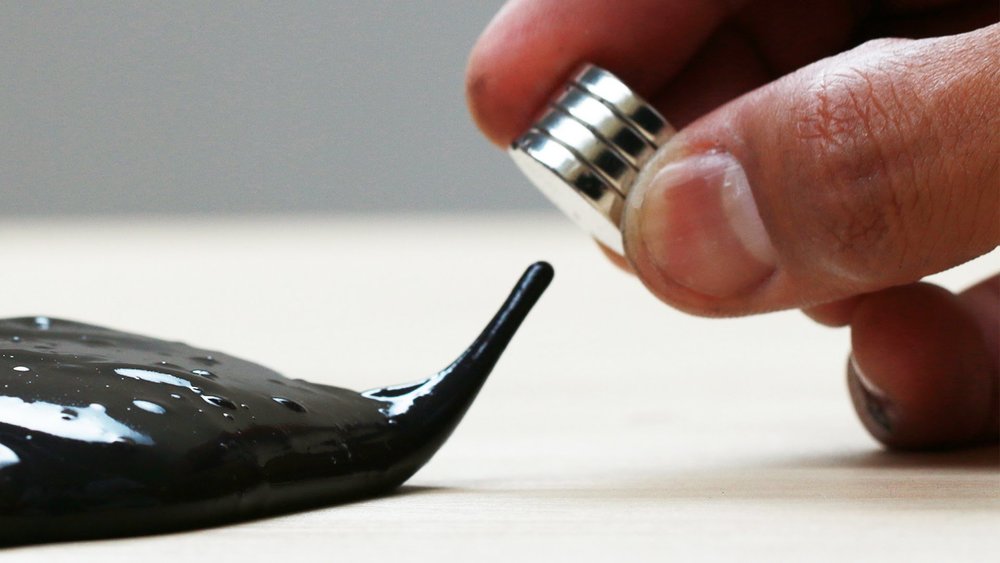
Magnetic Slime
This is a ridiculously fun activity. The recipe calls for the usual suspects; liquid starch and Elmer’s glue, but there are also some newcomers that really step up this DIY game.
You will need:
Liquid starch
Elmer’s glue
Iron Oxide powder
A bowl for mixing
Plastic spoons for stirring
A 1/4 cup measuring cup
A 1 Tablespoon measuring spoon
A rare earth/neodymium magnet – A regular magnet won’t be strong enough
Instructions
Pour 1/4 cup of white PVA glue into your mixing bowl. You may have to use the spoon to scrape all the glue out of the measuring cup
Add 2 Tablespoons of iron oxide powder. Stir well
Pour in 1/8 cup of liquid starch
Stir the glue and starch mixture really well to make sure that it’s all mixed. As soon as you begin to stir, the starch will react with the glue and the slime will start to form.
Knead the slime with your hands.
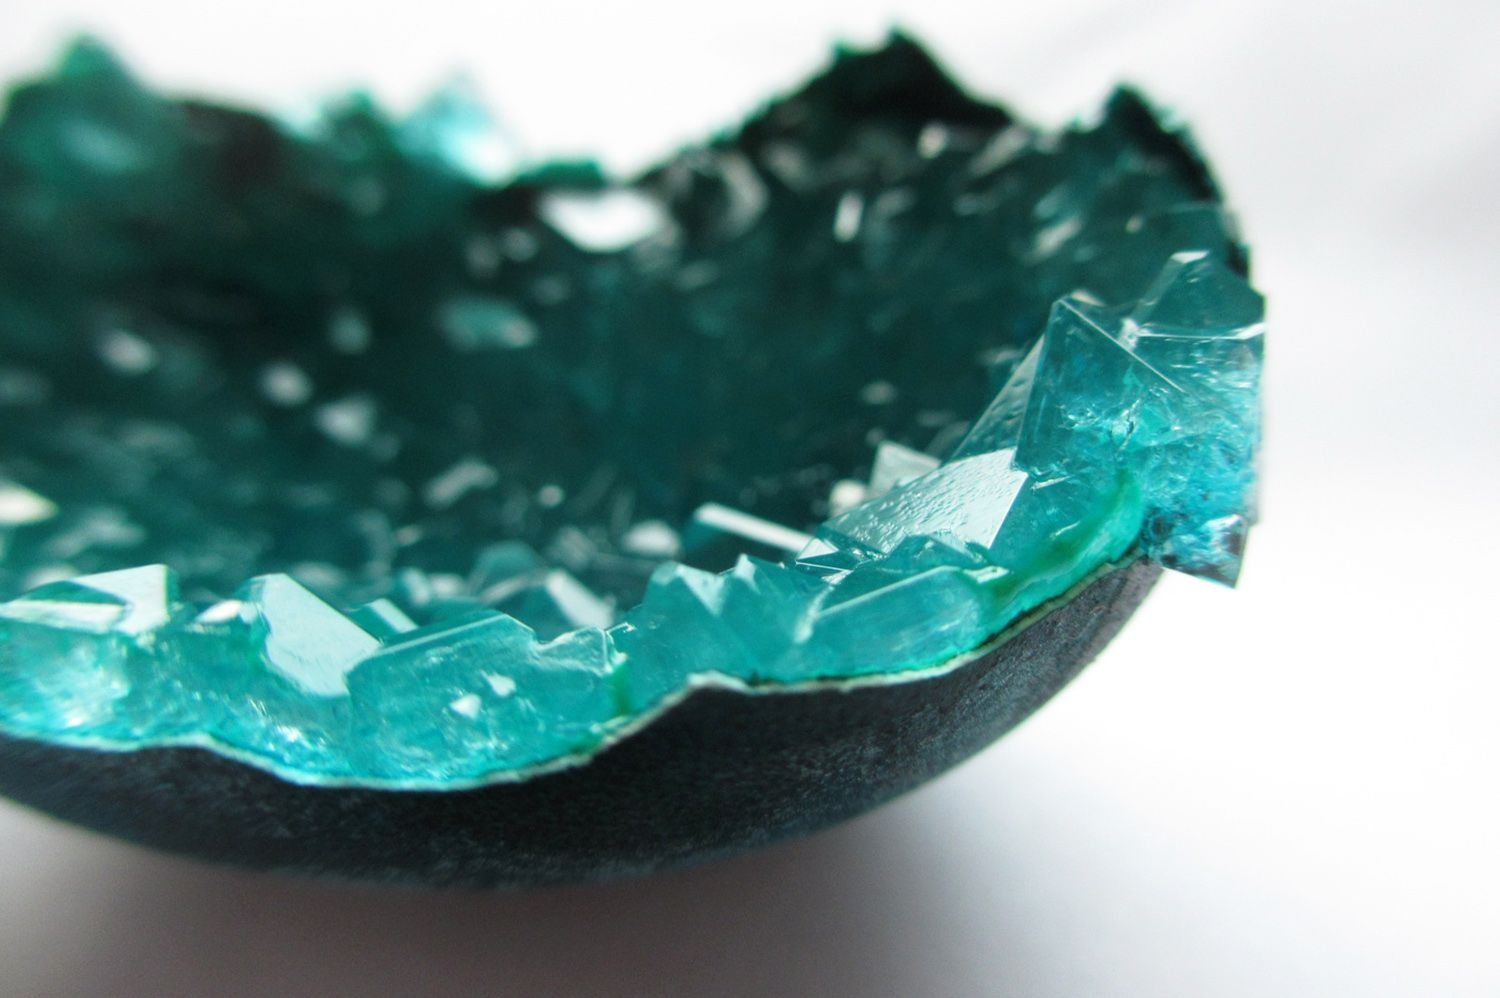
Egg Geodes
This quick, easy, and ultra-fun science experiment demonstrates how geodes are formed in nature. This activity also shows its maker different light reflections, shadow, color variations, depths, shapes, and textures. As well as using these as home decorations, you use the crystals and glue them to blank pendants and earrings to make your own jewelry!
You will need:
As many eggs as you’d like to make
As many coffee mugs as you have eggs
Spoons
Saucepan
Food dye
Egg cartons
Wax paper
You can use mini-muffin tins in place of the egg cartons and wax paper
You will also need any of the following or a few different types to make various textures:
Table salt
Rock salt
Sugar
Baking soda
Epsom salts
Sea salt
Cream of tartar
Instructions
Crack your eggs so that you have the bottom part of the egg as one solid half. It doesn’t matter if the top crumbles because you only need the bottom, rounder half. Also, if you don’t manage to crack your eggs in this way, no worries; your experiment will still work with any piece of eggshell!
Clean the eggshells with hot water.
Once the inside of the eggs have cooked a little, pull the egg membrane out of the inside of the eggs. Remove all of the egg membranes.
Use a mini muffin tin or an egg carton lined with waxed paper to hold your eggs upright.
Fill a saucepan with water and bring it to a boil.
Pour half a cup of water into one of your coffee mugs.
Choose one of your salt, sugar, or other solubles from the above list.
Add a ¼ cup of soluble to the water.
Stir it until it dissolves.
Add another ⅛ of hot water to your mix and stir it until it dissolves.
Your mixture should be so that no more soluble can dissolve in it. You’re going to have to eye this part or experiment!
Add your chosen food coloring.
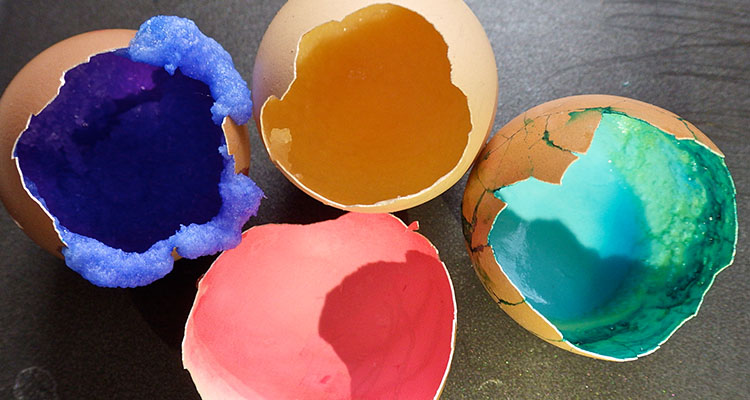
Pour your mix into one of your eggshells, filling it as full as possible without making it overflow or tip over!
Do this with as many different food colorings and solubles as you like!
Put your eggs aside and wait for the water to evaporate (get comfortable because this will take a while). Once all water is gone, you’ll start to notice fresh crystals forming. And there you have it, your very own bling in egg form!
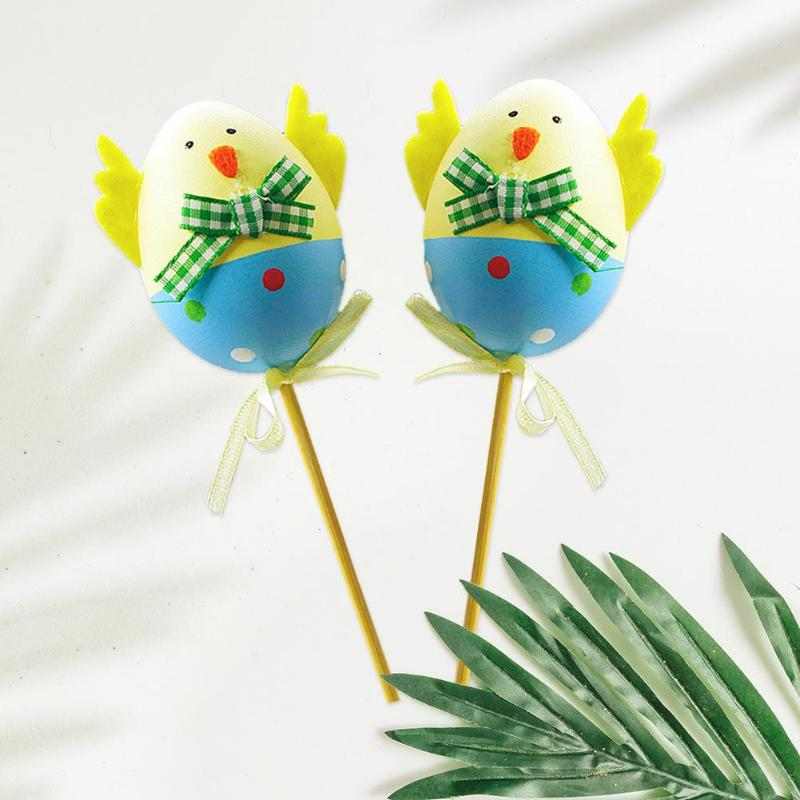
Egg on a Stick
What you’ll need:
1-2 eggs
As many sticks as eggs
Paint, food coloring or styrofoam balls and glue
Glitter, pens and extra ribbon to decorate (Optional)
Instructions
You can either make a hole in the top and one in the bottom of the egg to slowly blow out the filling into a bowl or hard boil it. The first way, you’ll have eggs to eat but it does make the egg more difficult to handle without breaking. The hard-boiled method is quite a bit more forgiving.
Go ham on your eggs! Paint them, stick things to them, dip dye them, do whatever strikes your fancy.
Once your eggs are dry to the touch, hold up the egg, gently but firmly, and tap the bottom with the pointy end of the stick. For hard-boiled eggs, you will need to tap the egg and press a little harder. Now you have an egg on a stick!
Tip: These make for pretty great flower pot decorations.
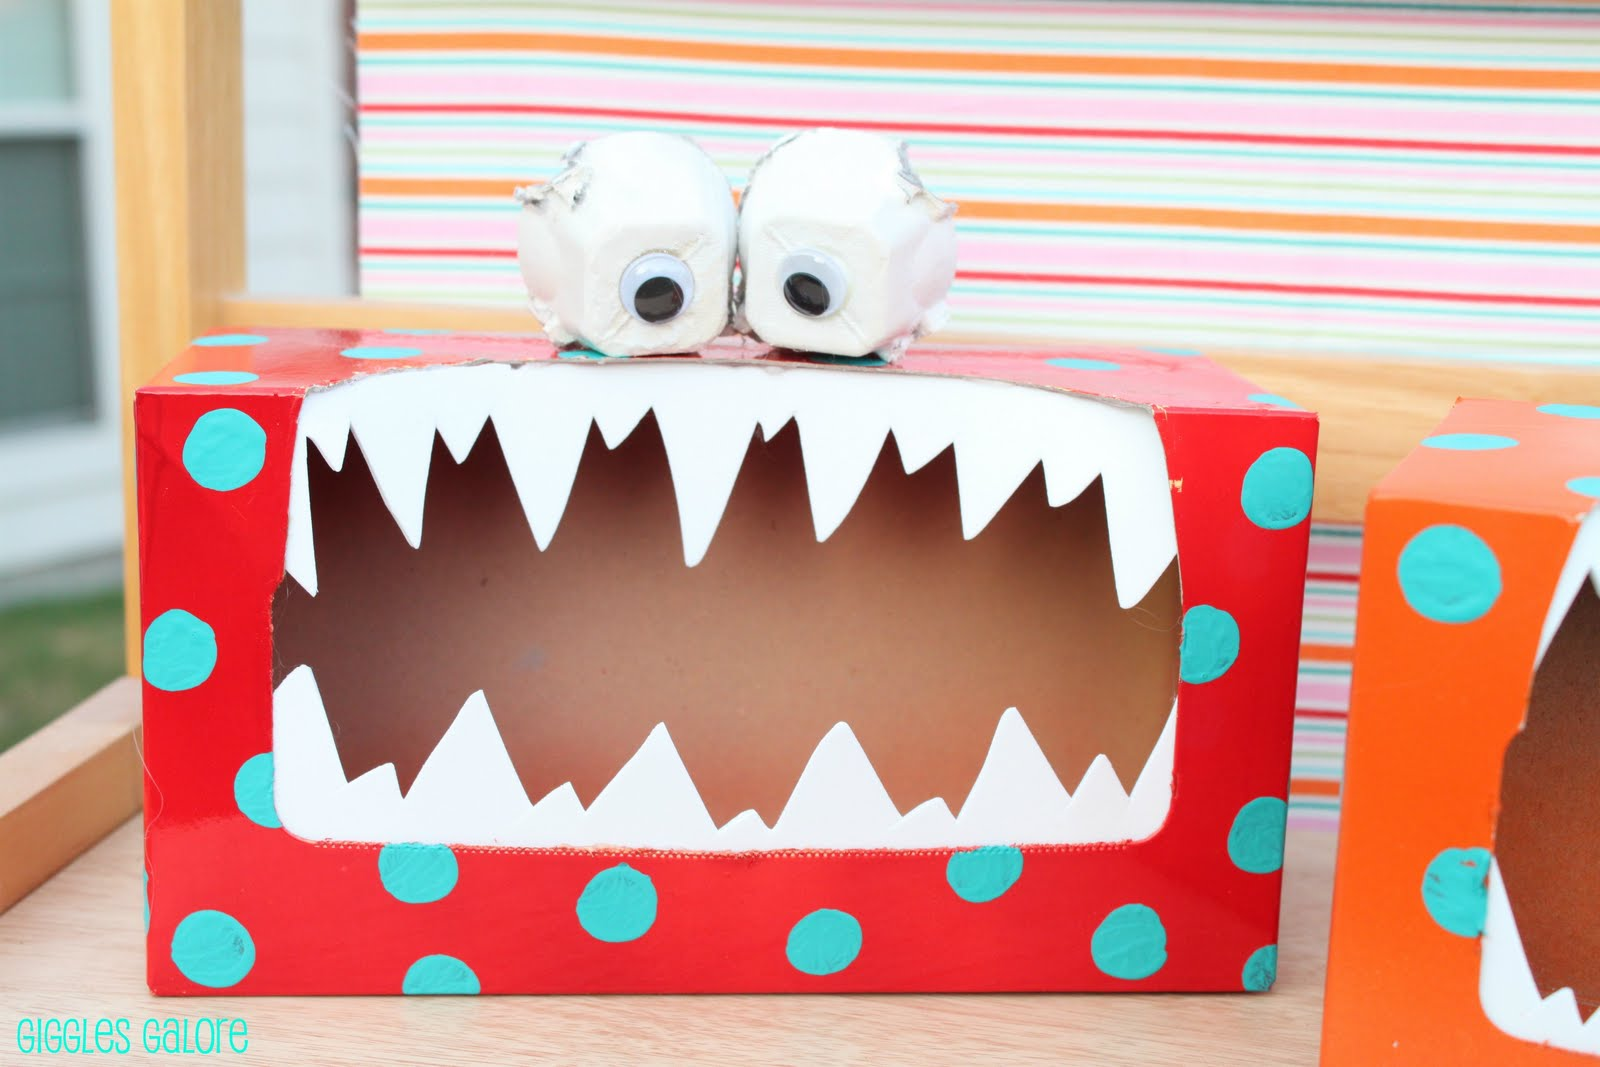
Tissue Box Monsters
You know that annoying feeling when you pull out the last tissue and have to deal with the empty box? Or when the store is completely out of paper towels of any variety? Well, if you do have an empty tissue box or a regular small box.
What you’ll need:
An empty tissue box or a small box with a round hole cut out
paints and brushes/fabric and glue/glitter glue/aluminum foil/scrunched-up paper
glue
spare cardboard
scissors
googly eyes (optional)
pom-poms, wool or any other fluffy craft items
Instructions
First paint the ‘skin’ of the monster – purple, blue, orange, you decide
If you have googly eyes, pop them on. No googly eyes at hand? No worries, you can just paint eyes straight onto the box
Once the monster has dried, decide what its teeth are going to look like
A big, wobbly row, or two fangs? Paint these on your separate bit of cardboard, cut them out and then glue them on the inside of the hole to make a mouth. You can also add ‘hair’ (fluffy craft items), arms, antennas and any other fun thing you can find around the house.
Beadless Bracelets
No beads? Not a problem. This recipe doesn’t call for your traditional beads. We’re going to use cardboard instead.
You will need:
Markers
Cardboard
Colored Thread/String/Wool
Instructions
Cut out a cardboard shape (circles or squares usually work best)
Next, pierce the cardboard either through the side or in the middle of the front/back
Once that’s done, draw on or color in each cardboard piece
Run a bit of thread through the holes
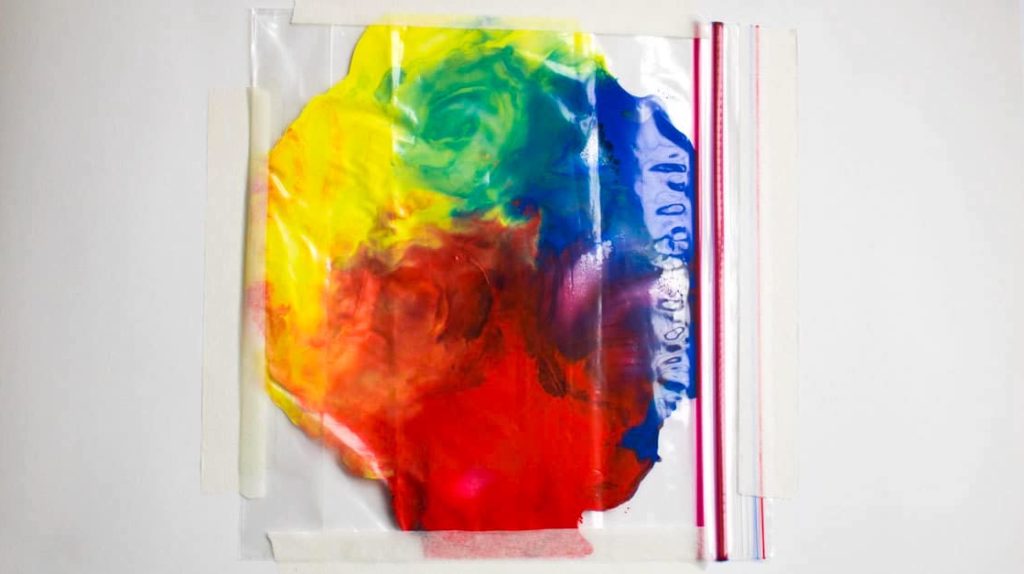
Sensory Bags
Sensory activities can encourage social, cognitive, physical, and linguistic development. For people with autism, ADD, ADHD, and other intellectual and developmental disabilities sensory can offer a lot of benefits. Sensory activities stimulate the brain, creating neural pathways and improving sensory processing systems, help improve social skills, have a calming effect, improve coordination, and improve motor skills.
You will need:
Ziplock bags
Acrylic paint in 5-6 different colors (preferably washable)
Coconut oil (or any cooking oil)
Duct tape
A small square of bubble wrap (optional)
A piece of aluminum foil (optional)
Instructions
Pick 3-4 paint colors per bag
Give a good squeeze of each color into the Ziplock bag of choice (make sure that the colors are next to each other without air bubbles if possible)
Add a tablespoon of oil to the bag
Gently squeeze out the air without mixing the paint too much
Seal the bag, fold the sealed edge over and tape it with duct tape
Squish and keep on squishin’! If you’d like see-through sensory bags, you can use hair gel and food coloring instead of paint and oil.

Rock Painting
You will need:
A few smooth rocks
Acrylic paint in 3+ colors
Art paintbrushes
Acrylic varnish to seal
Instructions
Paint your masterpiece however you want! If you like the design, seal it with the varnish. You can use these as paperweights or as colorful additions to the garden.
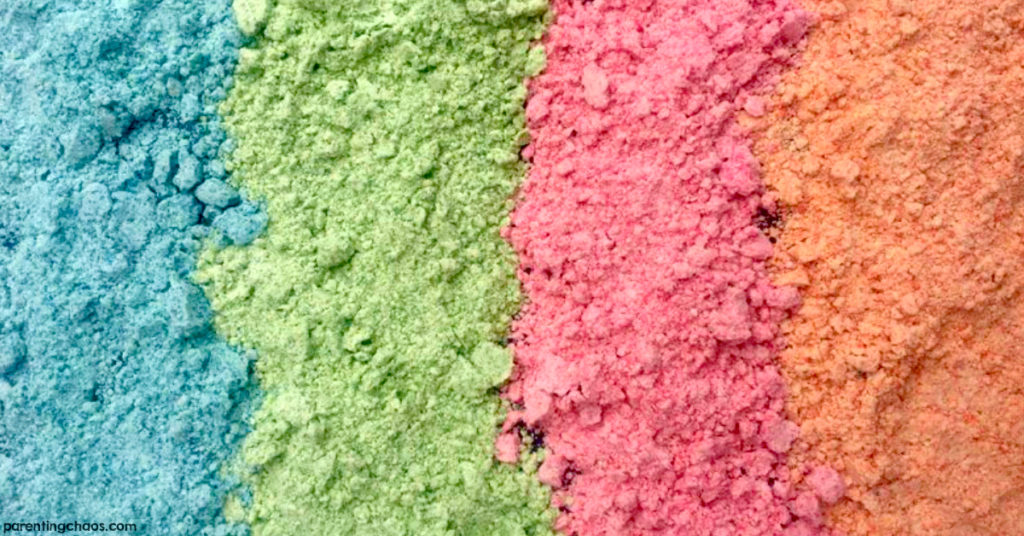
Rainbow Moon Sand
You will need:
3 cups of flour
12 tablespoons of canola oil
Red, orange, yellow, green, purple, and blue food coloring
6 bowls
Instructions
For each color, mix 1/2 cup of flour with 2 tablespoons of canola oil and add a few drops of the desired color. If your food coloring pack only has the primary colors; red, yellow, and blue, you can use them to create the secondary colors; purple, green, and orange. For purple, you can mix red and blue together, for orange you can use a mix of red and yellow, and for green, you can mix blue and yellow together.
And there you have 16 crafts for adults with intellectual and developmental disabilities. For more ideas, check out our Pinterest activities board.

About Stephen’s Place
Stephen’s Place is an independent apartment community for adults with developmental and intellectual disabilities, located in Vancouver, WA (7 minutes from Portland, OR).
If you have a loved one with developmental or intellectual disabilities, who is looking for a community to live in, please contact us for more information.
Stephen’s Place is a private-pay apartment community due to our state-of-the-art amenities and programs. We are a nonprofit and do not profit from our community. We are private pay because we spend more than some housing communities to ensure that our residents are comfortable and can safely live their lives with independence and dignity.